How to thin thick hair? Thinning hair means reducing hair density on the head. People might want to reduce their hair for various reasons, such as to make it easier to manage. They might also want to create a more layered look or reduce bulkiness.
There are different ways to thin hair, and the most effective method depends on an individual’s hair type and desired outcome. Some popular methods include thinning shears, straightening treatments, natural methods like aloe vera or egg whites, professional methods like razor cutting or texturizing, and specific styling techniques like invisible layers or a shag haircut. It’s key to choosing the right method for your hair type and desired outcome to achieve the most satisfactory results. So, let’s begin learning how to thin hair.
Contents:
How to thin hair with thinning shears?
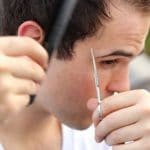
Thinning shears are scissors with teeth or notches on one side, while on the other side is a smooth blade. They are designed to remove some bulk or weight from hair without losing length. Thinning shears cut some hair strands while leaving others untouched, creating a textured and layered effect. Here are some step-by-step instructions on how to thin hair with thinning shears:
-
Separate your hair into 3-inch sections.
-
Hold the thinning shears diagonally with the tips pointing up at the ceiling.
-
Grab the first section of hair and place the shears halfway down the hair shaft.
-
Close the shears and slide them down the hair shaft, stopping about 1 inch from the ends.
-
Repeat this process on the same section of hair until you achieve the desired thinning level.
-
Move on to the next hair section and repeat the process.
It’s imperative to use thinning shears effectively and safely to avoid damaging your hair. Here are some tips:
-
Use thinning shears sparingly, as over-thinning can lead to frizz and split ends.
-
Start with a small amount of hair and work your way up to avoid removing too much hair at once.
-
Use sharp, high-quality thinning shears to avoid damaging your hair.
-
Avoid using thinning shears on wet hair, as this can lead to uneven results.
-
Clean and oil your thinning shears regularly to keep them in good condition.
How to thin thick hair?
Straightening treatment
A straightening treatment is a chemical process that breaks down hair protein bonds that give it its shape. This allows it to be reshaped into a more manageable style. It can also help thin out hair by reducing volume and creating a smoother, more streamlined look. Here are some step-by-step instructions on how to do a straightening treatment at home:
-
Choose a straightening treatment suitable for your hair type and desired outcome. Some popular options include keratin treatments, Japanese straightening, and Brazilian blowouts.
-
Wash your hair with a clarifying shampoo to remove buildup or residue.
-
Towel-dry your hair and comb it out to remove tangles.
-
Apply the straightening treatment according to the package instructions. This usually involves dividing your hair into sections and applying the treatment from root to tip.
-
Leave the treatment on for the recommended amount of time, then rinse it thoroughly.
-
Blow-dry your hair straight using a round brush, then flat iron it in small sections to seal in the straightening treatment.
It’s a necessity to use straightening treatments effectively and safely to avoid damaging your hair. Here are some tips:
-
Choose a high-quality straightening treatment and follow the instructions carefully.
-
Avoid using straightening treatments too frequently, as this can damage your hair.
-
Use a heat protective spray when blow-drying and flat ironing your hair to minimize damage.
-
Avoid using hair ties or clips for at least 48 hours after the treatment to let it set properly.
-
Use a sulfate-free shampoo and conditioner to maintain the straightening treatment results.
Natural methods for thinning hair:
-
Essential Oils
-
Mix three to four drops each of rosemary, peppermint, and sage essential oils in one tablespoon of olive oil or coconut oil.
-
Massage the mixture into the scalp and hair.
-
Leave it on for 30 minutes, then rinse it out with shampoo and conditioner.
-
Pumpkin Seed Oil
-
Take pumpkin seed oil supplements or add them to your diet.
-
The pumpkin seed oil contains phytosterols that reduce hormone imbalances that can lead to hair loss.
-
Aloe Vera
-
Apply aloe vera gel to the scalp and hair.
-
Aloe vera contains proteolytic enzymes that help heal and repair dead skin cells, which could help stimulate hair growth from dormant hair follicles.
-
Horsetail and Oatstraw
-
Drink horsetail and oat straw tea or take supplements.
-
Horsetail and oat straws contain silica, which is essential for healthy hair growth.
Here are some tips for using these natural methods effectively and safely:
-
Use high-quality, pure essential oils and aloe vera gel.
-
Do a patch test before using any new product to check for allergies or irritation.
-
Consult with a healthcare professional before taking any supplements.
-
Use these natural methods consistently over time to see results.
-
Be patient, as natural methods may take longer to show results compared to chemical treatments.
How to use aloe vera for thinning hair?
Aloe vera is a natural ingredient that helps with thinning hair. Here are some steps on how to use aloe vera for thinning hair:
-
Aloe Vera and Olive Oil
-
Take 2 tablespoons of aloe vera gel and 3 tablespoons of olive oil in a bowl and mix well.
-
Use this mixture to massage your scalp for 10 minutes.
-
Leave it on for 30 minutes and then rinse it off with a mild shampoo.
-
Aloe Vera and Green Tea
-
Mix equal parts of aloe vera gel and freshly brewed green tea.
-
Apply this mixture to your scalp and give it a gentle massage for a few minutes.
-
Leave it on for 30 minutes and then rinse it off with a mild shampoo.
-
Aloe Vera and Essential Oils
-
Mix half a cup of aloe vera gel with ten to fifteen drops of essential oil of your choice.
-
Stir the mixture to combine and transfer it to a pump bottle.
-
Use this mixture as a leave-in conditioner after each hair wash.
Professional methods
Professional methods for thinning hair include razor trimming and texturizing. Razor cutting involves using a razor blade to cut hair at an angle, creating a softer, more textured look. Texturizing involves using special scissors or shears to remove some of the bulk from the hair, creating a more layered look. These methods can help thin out hair by removing some of the weight and creating a more manageable style.
When communicating your desired outcome, be specific about how much hair you want to be removed and what type of style you’re looking for. It’s also important to listen to the stylist’s recommendations and ask any questions you may have before the process begins.
Overall, professional methods for thinning hair can be an effective way to achieve a more manageable and stylish look. However, it’s important to choose a qualified stylist and communicate your desired outcome clearly to achieve the best results.
Styling tips
-
Use thinning shears: Thinning shears can help remove some of the bulk from thick hair and create a more manageable style.
-
Layered haircut: A layered haircut can help remove some of the bulk from thick hair and create a more manageable style.
-
Bob haircut: A bob haircut can help create a more streamlined look and reduce the volume of thick hair.
-
Pixie haircut: A pixie haircut can help create a more edgy and modern look for thick hair.
-
Avoid heavy styling products: Avoid using heavy styling products like pomades, oils, or waxes, as they can weigh your hair down and make it look more voluminous.
-
Blow-dry your hair in sections: Blow-dry your hair in sections to ensure that each section is thoroughly dried and styled.
-
Use a diffuser: Use a diffuser attachment on your blow dryer to help distribute heat evenly and create volume.
-
Experiment with different hairstyles: Try different hairstyles, such as braids, buns, or ponytails, to find what works best for your hair type.
Overall, it’s worthwhile to experiment with different styling techniques and products to find what works best for your hair type. With the right styling tips and techniques, you can create a more manageable and stylish look for thick hair.
Conclusion
In conclusion, there are various methods for thinning hair, including natural methods, professional methods, and styling techniques. Each method has its pros and cons, and the most effective method depends on the individual’s hair type and desired outcome. Thinning hair can control volume, reduce flatness, and create the illusion of thicker hair. However, it can also lead to frizz and damage to curly hair. It’s critical to choose the right method for your hair type and desired outcome and use it effectively and safely. We encouraged you to experiment with different methods to find what works best for them.
Faqs
How to thin hair at home?
Thinning hair can be done at home using thinning scissors or shears. Here are some steps to follow:
-
Begin with clean, dry hair. Shampoo and dry your hair as normal. Your hair should be as close to its normal, everyday texture as possible. This prevents you from over-thinning your hair.
-
Gather a 2-3 inch wide section of hair to thin. It’s best to thin a section at a time, and thin the same amount all around your head. Hold the first section away from your head and clip the rest back, focusing on just the ends of the section that you have.
-
Position the thinning shears a few inches away from your roots. Holding the shears at a 45-degree angle, glide them down your hair shaft. You can always do more but never return, so thin your hair slowly. Work your way around your head, avoiding your roots.
-
Don’t add any styling products to your hair before thinning it. These can clog the shears and change how full your hair looks, which will affect your ability to thin it properly.
-
Switch to hydrating shampoos and conditioners to reduce frizz.
What are the best types of thinning shears to use?
Thinning shears come in different designs and styles, and the best type to use depends on your preference and hair type. Here are some of the best types of thinning shears to use:
- 44/20 460-EX Thinning Shears: According to Olivia Gomez, a barber with 20+ years of experience, 44/20 is more or less standard in shears and is popular among barbers.
- Equinox Professional Hair Thinning Shears: These shears have a non-slip grip, making them easy to handle and control.
- Kinsaro Thinning Shears: These shears have an ergonomic handle and grip, making them comfortable to use for extended periods of time.
- Matsui Precision Rose Gold Thinning Shear: These shears have a rose gold finish and are designed for precision cutting.
- Joewell E30/E40 Thinning Shears: These shears are of professional quality and are designed for precision cutting.
Ultimately, the best type of thinning shears to use depends on your hair type and the style you want to achieve. It’s best to consult with a professional stylist or barber to determine the best type of thinning shears for your hair.
What are the differences between reversible and double-sided thinning shears?
Reversible and double-sided thinning shears are two types of thinning shears that have some differences. Here are the differences between reversible and double-sided thinning shears based on the search results:
Reversible thinning shears:
- Have teeth on both blades and can be used with both hands.
- Work well for removing a large chunk of hair in one go.
- Are designed to eliminate blunt lines and add controlled texture to hair.
Double-sided thinning shears:
- Have two thinning blades with no straight edge.
- Each blade has thinning teeth on it and is used to thin out the hair.
- Can be less time-consuming than reversible thinning shears.
- Give the feeling of texture to your hair and create volume.
- Cut and provide the edge to your hair from both sides, making your hair more textured.
What are the benefits of using reversible thinning shears?
Reversible thinning shears have several benefits, including:
- Versatility: Reversible thinning shears can be used with both hands, making them versatile and easy to use for both right- and left-handed individuals.
- Time-saving: Reversible thinning shears can eliminate a large chunk of hair in one go, making them a time-saving option for those who want to thin their hair quickly.
- Controlled texture: Reversible thinning shears are designed to eliminate blunt lines and add controlled texture to hair, making them a great option for those who want to add texture to their hair without removing too much volume.
- Comfort: Reversible thinning shears are designed with ergonomic handles and grips, making them comfortable to use for extended periods of time.
How do reversible thinning shears differ from other types of thinning shears?
Reversible thinning shears differ from other types of thinning shears in the following ways:
- Teeth on both blades: Reversible thinning shears have teeth on both blades, which makes them versatile and easy to use for both right- and left-handed individuals.
- Controlled texture: Reversible thinning shears are designed to eliminate blunt lines and add controlled texture to hair, making them a great option for those who want to add texture to their hair without removing too much volume.
- Ergonomic handles and grips: Reversible thinning shears are designed with ergonomic handles and grips, making them comfortable to use for extended periods of time.
On the other hand, other types of thinning shears such as double-sided thinning shears have two thinning blades with no straight edge, and each blade has thinning teeth on it and is used to thin out the hair. Double-sided thinning shears can be less time-consuming than reversible thinning shears and give the feeling of texture in your hair and create volume.
Blending shears, another type of thinning shear, have one blunt blade and one blade with teeth, which gives the user the ability to stay in control of the amount of hair to be removed[1]. Ultimately, the choice between reversible, double-sided, and blending shears depends on personal preference and the desired result.
What are some common techniques for using reversible thinning shears?
There are several techniques for using reversible thinning shears, including:
- Removing interior weight: Reversible thinning shears are great for removing interior weight from hair, which can help create volume and texture.
- Texturizing the surface layer: Reversible thinning shears can be used to texturize the surface layer of hair, which can add movement and dimension to the hair.
- Creating volume: Reversible thinning shears can be used to create volume in the hair by removing excess weight and adding texture.
- Using with both hands: Reversible thinning shears can be used with both hands, making them versatile and easy to use for both right- and left-handed individuals.
When using reversible thinning shears, it’s important to work slowly and carefully to avoid removing too much hair. It’s also important to use the shears on dry hair to ensure an even cut.
How to properly hold reversible thinning shears?
To properly hold reversible thinning shears, follow these steps:
- Hold the shears with your dominant hand. The thumb should be in the smaller hole and the remaining fingers should be in the larger hole.
- Place your index finger on the top of the shears, near the pivot point.
- Place your middle finger on the bottom of the shears, near the pivot point.
- Use your ring finger and pinky finger to stabilize the shears.
- Open and close the shears a few times to get a feel for the movement.
- Begin using the shears on the section of hair you want to thin, starting at the ends and working your way up.
- Use a comb to hold the section of hair taut and use the shears to remove small sections of hair at a time.
- Work slowly and carefully to avoid removing too much hair.
- Repeat the process on other sections of hair as needed.
It’s important to use the shears on dry hair to ensure an even cut and to work slowly and carefully to avoid removing too much hair.
What is the difference between an opposing grip and an offset grip for thinning shears?
The difference between an opposing grip and an offset grip for thinning shears is in the placement of the thumb and finger rings. Here are the differences between opposing and offset grips:
Opposing grip:
- The finger and thumb rings are in a stacked position, requiring you to bend your thumb to reach the grip.
- The thumb is furthest away from the pivot, maximizing leverage but at the cost of ergonomics.
- The opposing grip is best used for blending or thinning shears, as it allows the teeth of the shear to be pointing up or down.
Offset grip:
- The thumb ring is set forward, so the thumb does not have to bend as much to reach the grip.
- The shorter thumb blade helps keep the hand and wrist in a more neutral position, reducing the risk of repetitive wrist strain over time.
- The offset grip is a better option for optimal comfort and safety.
In summary, the opposing grip has the finger and thumb rings in a stacked position, while the offset grip has the thumb ring set forward. The offset grip is a better option for optimal comfort and safety, while the opposing grip is best used for blending or thinning shears.

